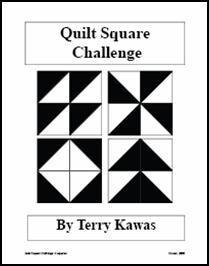
Background
This activity is designed to help students develop spatial sense by decomposing shapes into smaller units. Students are shown a quilt square and must use their small quilt pieces to create that design in either the 4-square or 9-square mat by sliding and turning the quilt pieces to achieve the desired image. Students should assemble the quilt pieces on either the 4-square or 9-square mat which helps them organize their work.
The Quilt Square Challenge was originally designed for a middle school unit on transformations. Since then, students as young as first grade have enjoyed the challenge and mastered the art of transforming quilt pieces to produce the desired design. It is amazing to watch students as they maneuver the pieces and improve their spatial sense over the course of the activity.
Classroom Management Suggestions
Make overheads of the quilt patterns or use the pdf file with an LCD projector so that students see a large visual of the pattern. Provoke discussion with students about how they see the pattern. Some students reproduce using the black spaces; others see the white spaces. Many students see a pattern (e.g. tree, boat) that helps them reconstruct the pattern. Other students scan square by square and reconstruct the design one square at a time.
Provide adequate time for students to complete the different patterns. Some teachers check students' completed work, then allow these students to "mess around" with other designs while other students are finishing the challenge design. Encourage students to use the  Quilt Design Sheet to record their own creations throughout this exploration.
Materials:
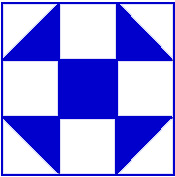
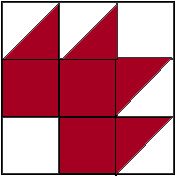
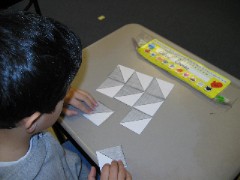
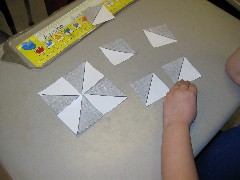
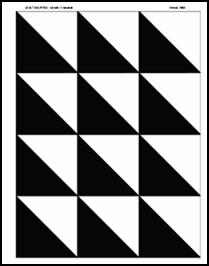
- Quilt Squares:Each student needs nine quilt squares which are half-black and half-white, the divider being the diagonal which essentially cuts the square into a black triangle and a white triangle. It is suggested that the student quilt square handout be copied on card stock so that the quilt squares withstand lots of use.
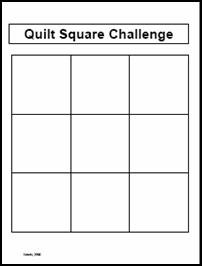
- Quilt Mat: This two-sided mat has a 4-square quilt mat on one side and a 9-square quilt mat on the other side. Use the quilt mat handouts to create a two-sided quilt mat for each student.
- Overhead Quilt Squares:Copy the student quilt squares handout onto a transparency. Cut apart the quilt squares to create overhead versions of the student quilt squares which can be used to demonstrate patterns
- Overhead Quilt Mats:Copy the student quilt mats onto transparencies to create overhead quilt mats.
- Overhead copies of the Quilt Square Challenge patterns or poster copies of the Quilt Square Challenge patterns: The teacher needs one copy of each pattern to show students so that they can replicate the pattern using their quilt pieces. It is the teacher's choice to use the overhead or the paper copy.
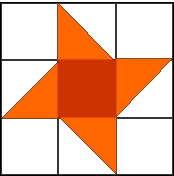
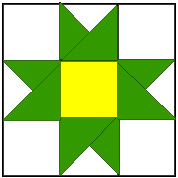
- Blank copies of the 9-square quilt mat: for students to create,color and name their own quilt designs. NOTE: Asking students to all use the same color scheme (e.g. red, white and blue for patriotic or black and orange for Halloween) encourages students to generate creative patterns and all quilt squares can easily be displayed to create a unified quilt on a classroom bulletin board or in the hallway.
Lesson:
- Distribute all materials to students and ask students to take out only 4 quilt squares.
- Ask students to turn their quilt mats to the 4-square side.
- Show students one of the 4-square patterns and ask them to use their 4 quilt squares to recreate the pattern.
- Circulate around the room to help students, as needed. Allow early finishers to help other students.
- Pick a student to recreate the pattern on the overhead.
- Repeat with other 4-square patterns.
- Discuss how students look at the pattern. For example, some students recreate the pattern square by square; other students look at the "black part" and recreate that; still others look at the "white part" and recreate that.
- Ask students to take out 5 more quilt squares so that they have 9 quilt squares to use. They should also turn their mats over to the 9-square side.
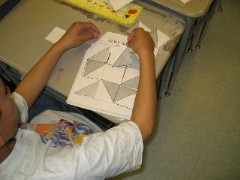
- Show students one of the 9-square patterns and ask them to recreate that pattern on their mats.
- Circulate around the room, checking student progress.
- Ask a student to recreate the pattern on the overhead.
- Repeat with other 9-square patterns.
- Finally, distribute the blank 9-square paper mats and ask students to use pencils to create a pattern. They should decide on a color scheme, making pencil markings to code the scheme before coloring it. Students should name their block and sign it on the back.
- Assemble all quilt squares into a classroom patchwork quilt for all to enjoy.
Quilting Templates:
- Quilt Pieces
- Quilt Mats
- 4-Square Quilt Patterns
- 9-Square Quilt Patterns
- Paper Pattern for original quilt square
- Quilt Design Sheet